基于RPi和LXD的ESP32开发环境

2022-11-22 作者:

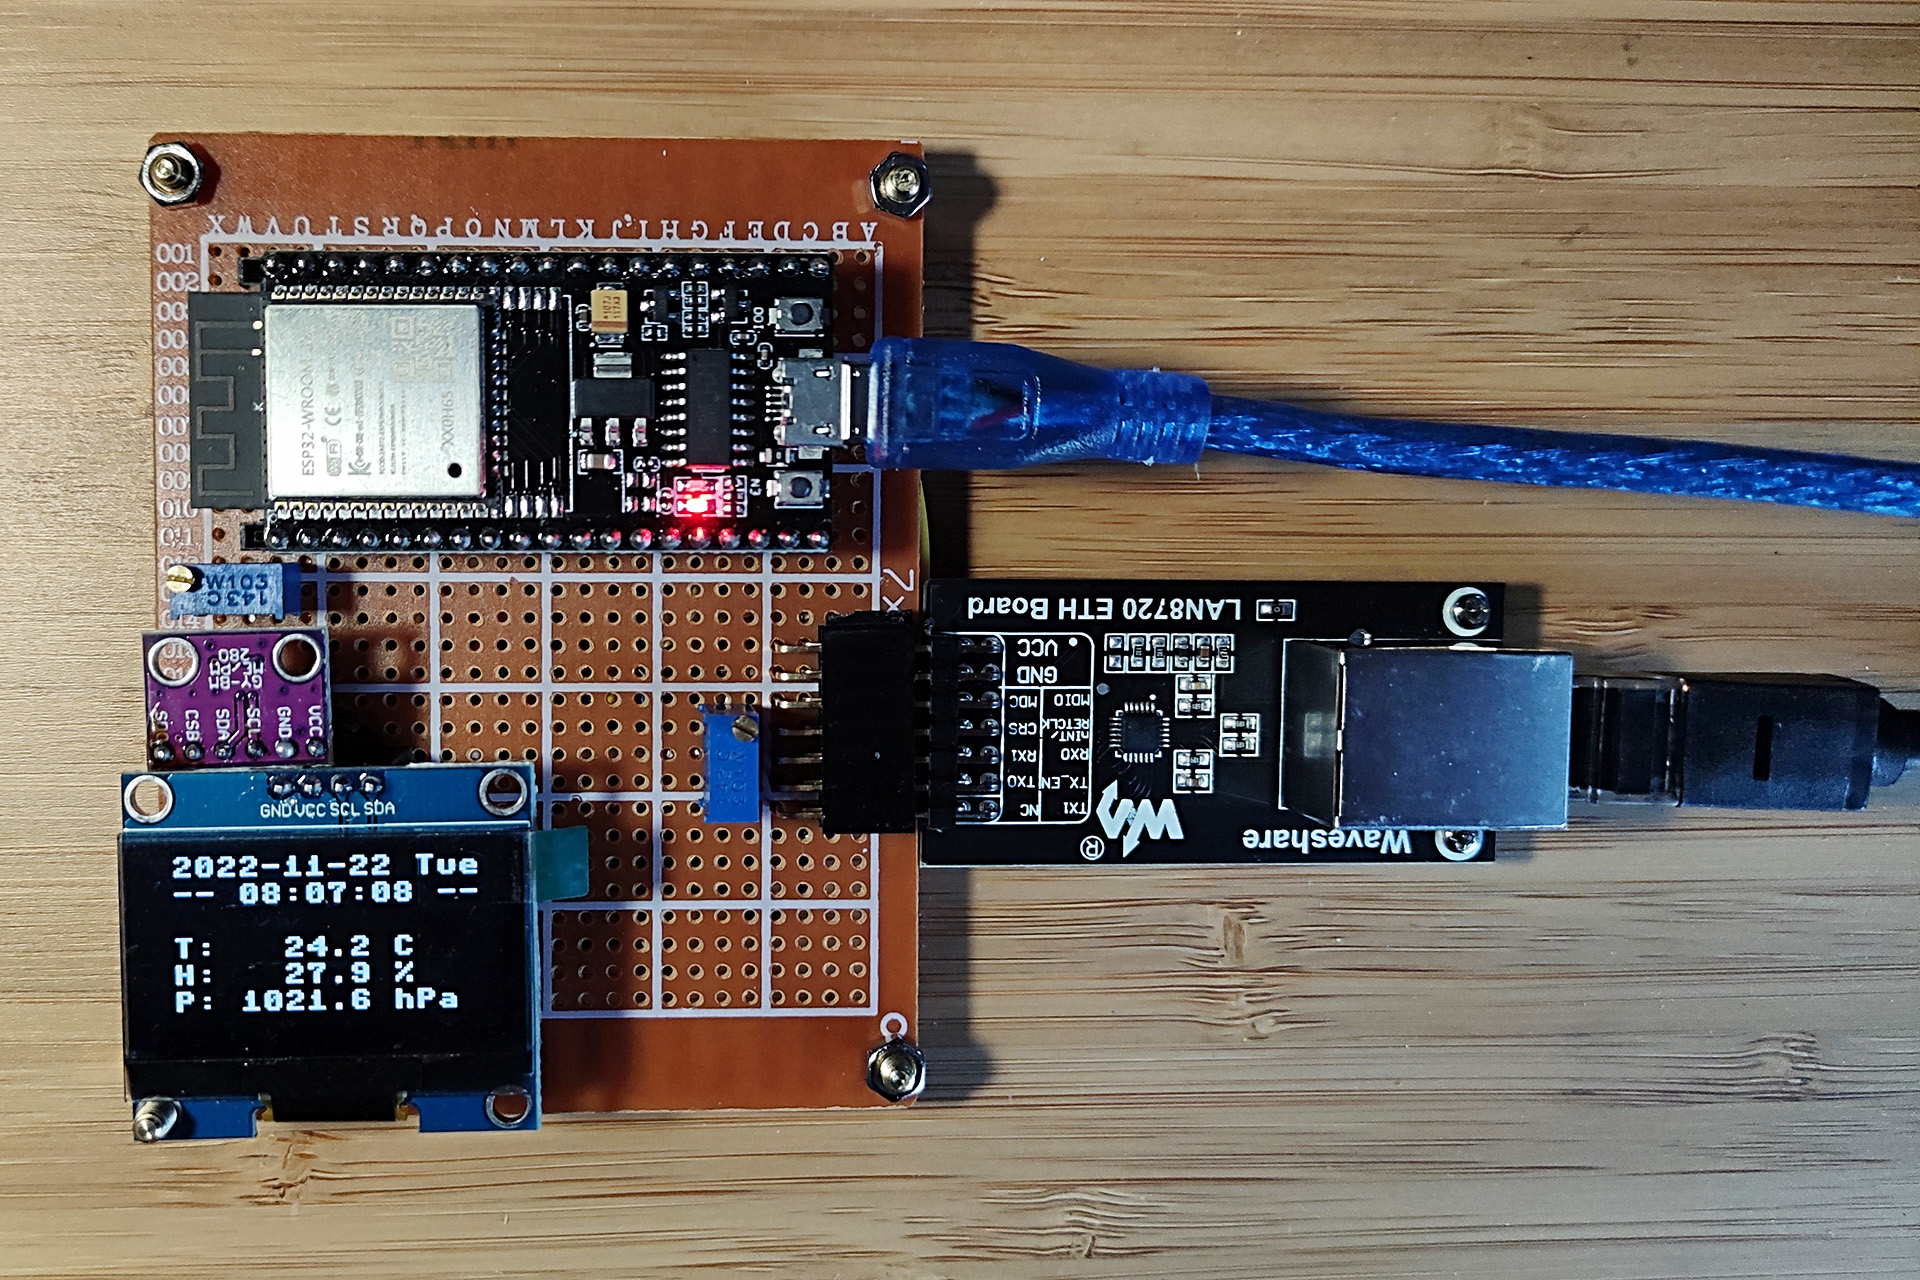
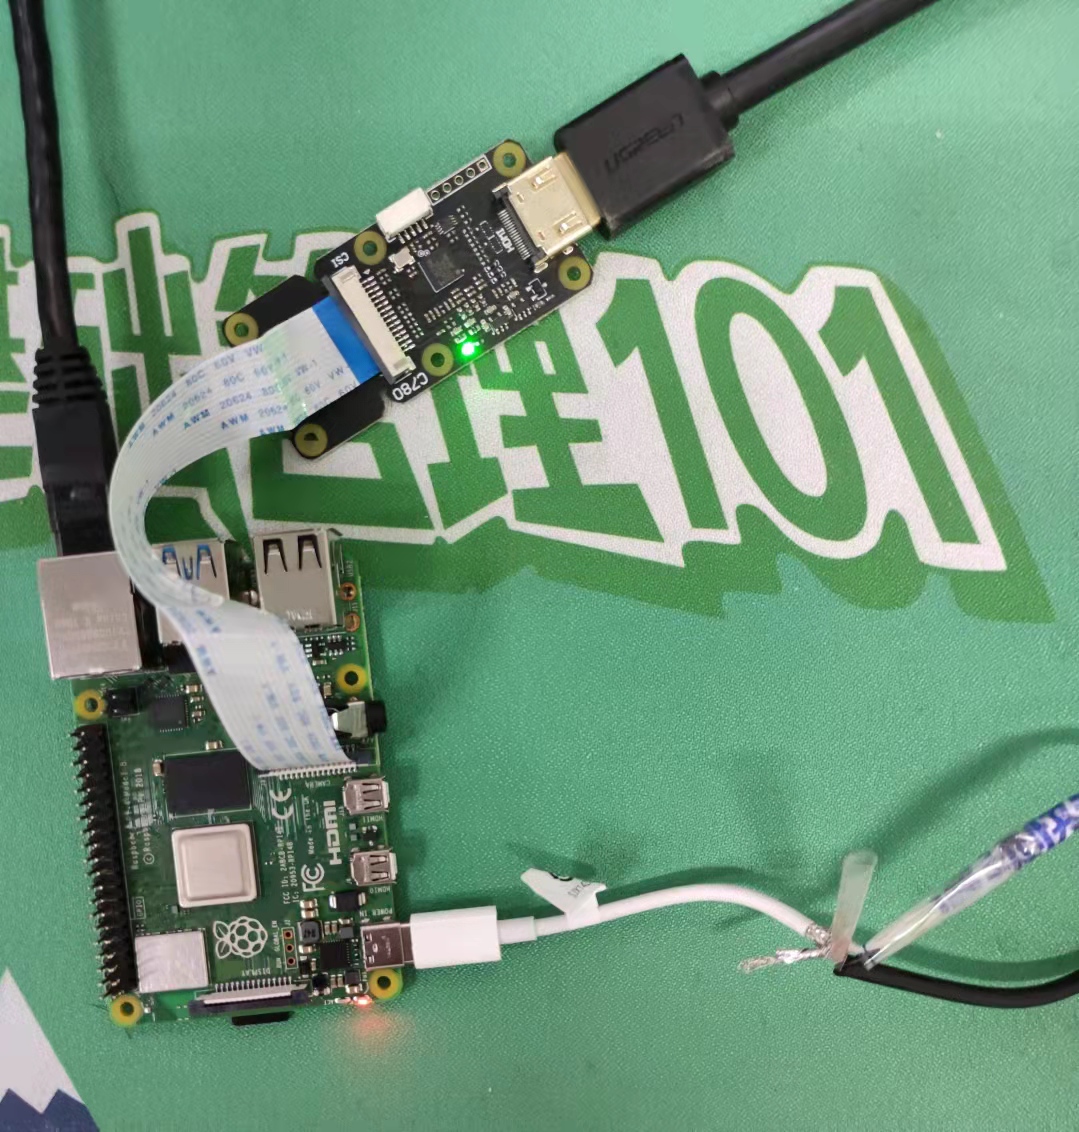
对于在板子手动重启时经常把ESP32带进下载模式的问题,LAN8720所需的上/下拉电阻恐怕是最大嫌犯。于是斥巨资近CNY 10元采购了万用板、线仔包和各种直/弯母座,终于搞了MKII —— 重启可靠性问题果然迎刃而解。

过程中,基于lxd的Debian in Debian做了套新环境,顺手也试了试C语言的esp-idf编译,用起来整体感觉很顺手。

RS232 connected with an lxc in raspberry pi 4b (not in pic)

Yes, it actually performs nicely to work on ESP32 development in debian bullseye LXD in Pi OS, no mater you’re working on hardcore C lang based esp-idf or the nice & easy micropython development.

“Hmm… so you need a standard Debian in a derived Debian? “

Well, since I found out that LXD is something very helpful to isolate different needs on different Linux distributions in different containers, while it kinda works pretty much like vm (instead of docker) since it’s easy to config the resources consumption or even usb devices pass-through, and the most important – having its own block storage which can be exported into a single archive.
Then, the only thing I can’t agree with, could be the deep connection with the snapd. Instead of switching to another distribution, such as Arch, I choose to build the LXD of my own (on both Pi OS aarch64 and Ubuntu 22.04 X86_64). Thanks to the good documentation, the stuff (native lxd without the snap crxp) works like a charm.

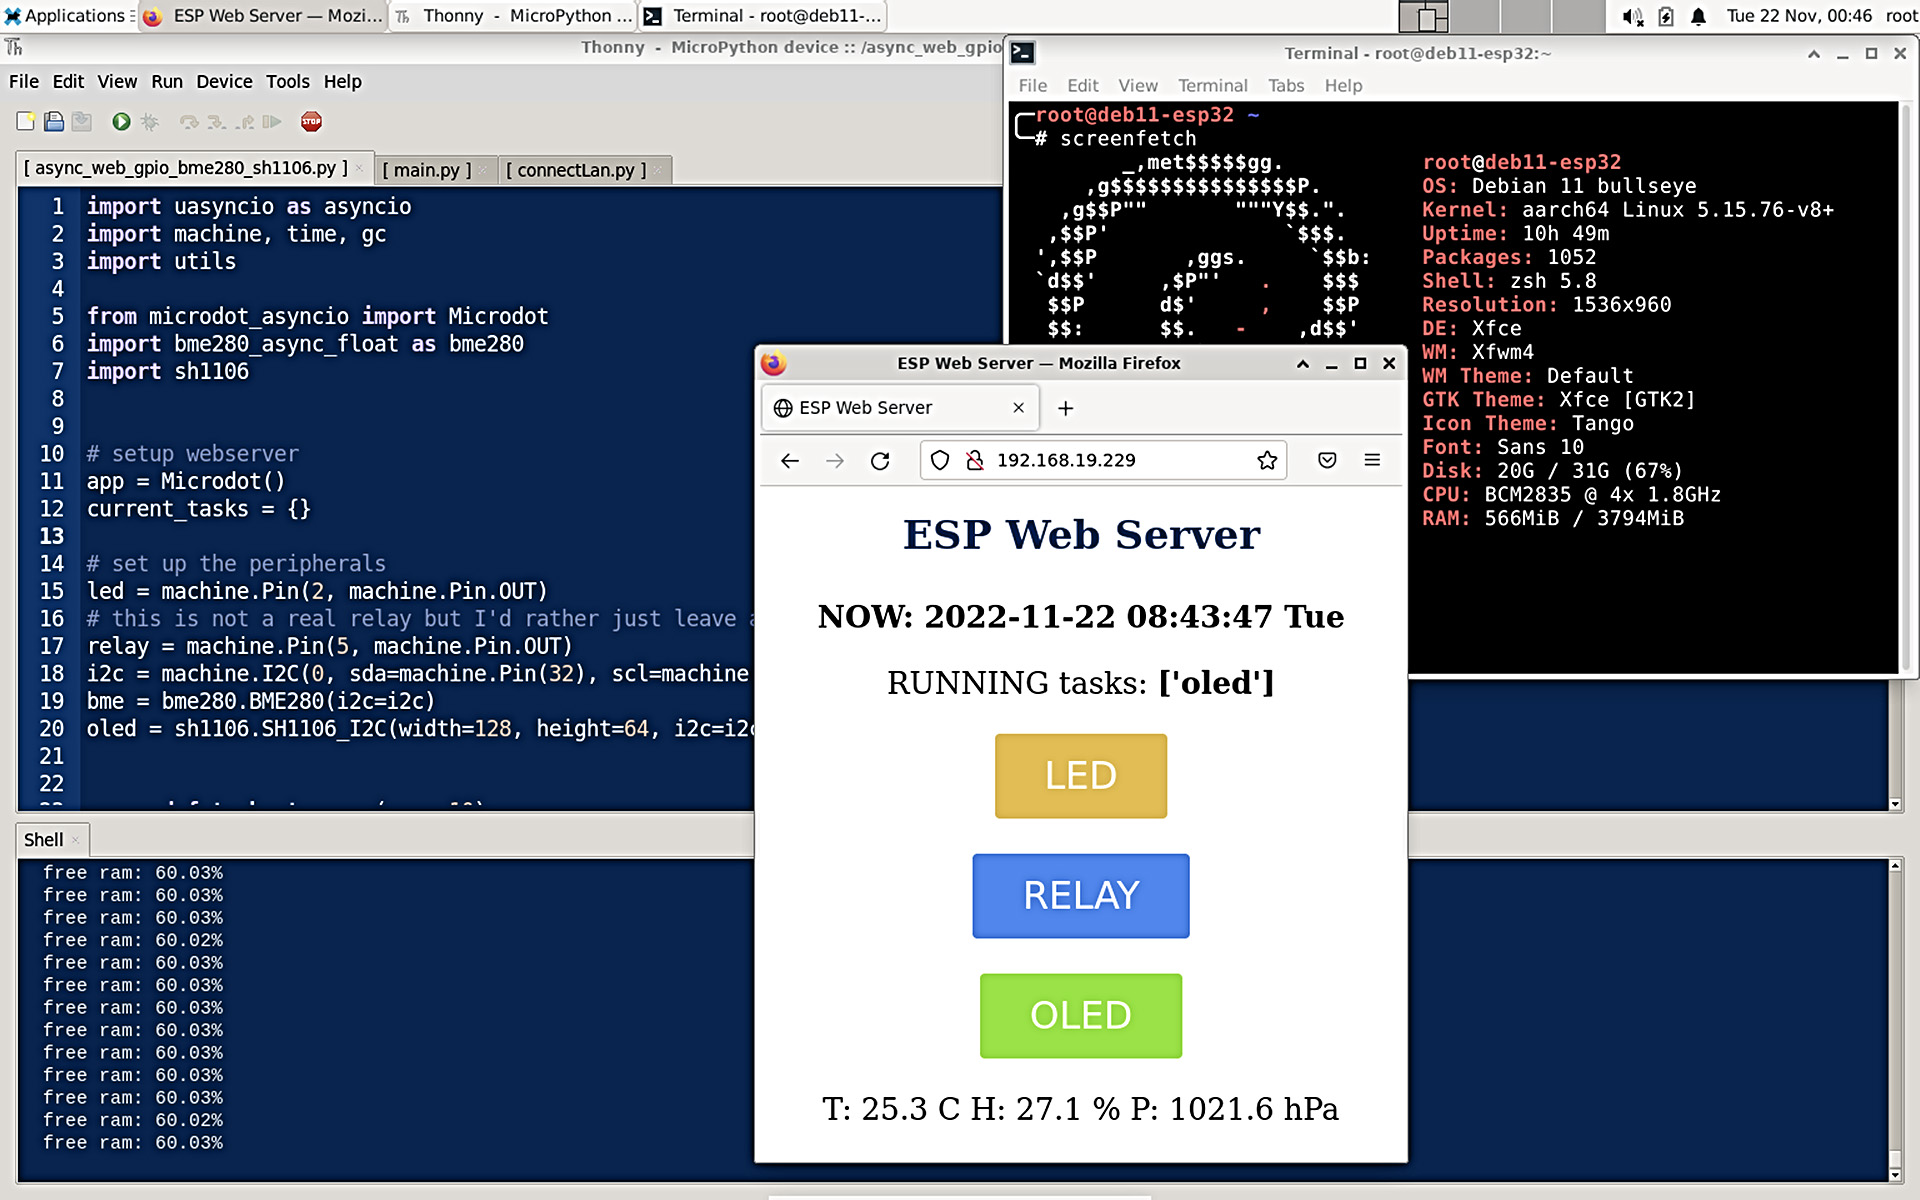
with Xfce and xrdp, the bullseye lxc can work as an esp dev server quite well

完整阅读本篇»

ESP32 + uPython + uaiohttpclient

2022-11-05 作者:

Updated 2022-12-01: Let go this rough  uaiohttpclient since it’s kind too simple (just GET, no POST, and lacking almost anything needed) to be integrated to something really useful. So currently I’m using someone’s own stuff (async mod on urequests) that works – from the REPO HERE.


This is a basic test around the async http client of micropython, which is NOT built-in with the official uPy image on download page of offcial site. Anyway it can be easily installed thru the  upip  – make sure you have sufficient free RAM before the installation though, otherwise it could fail.

I somehow guess that the reason it’s not included in standard build might be… the asyncio is not quite common among the uPy developers? So people can use the built-in urequests instead.

Well I’m not an async – await Python guy on Mac/Linux either (since we’ve an powerful O/S anyway), but here I consider it might be the only method, AFAIK, to make my ESP32 nodeMCU work with kinda multi-tasking with uPy, non-preemptive, though. If not, then I’m about to be left with no choice and head back to the C stuff (with a traditional RTOS), right?

完整阅读本篇»

HAOS集成和风天气

2022-09-27 作者:

室内搞完了,室外就别搞传感器了,直接走api拉数据。

系统默认集成的OpenWeather和AccuWeather都不太靠谱,前者填了api key后报无效,后者是数据离实际差距大+免费api次数不够用,最后还得自己搞国内的天气服务API。

注册了高德、和风两家,后者虽然没有前者的品牌,但毕竟数据种类更齐全,用来练手是不错的。

效果如下:

至于怎么安装,其实什么插件都不用装,直接File Editor插件编写 /config/configuration.yaml ,保存无误后,重启服务即可。

【注】重启服务,只需要“配置”->“系统”->“重新启动”。这个过程很快,30s搞定。不需要重启整个HAOS的vm或者物理机,那个时间要长很多。

要写什么内容呢?

完整阅读本篇»

PVE + HomeAssistant + ESPHome

2022-09-24 作者:

Today let’s try out this ESP32-C3-12F dev board that costs only $5 (domestic shipping included) but has 3 power supply mode (AC 220V, DC 7~12V and microUSB, which is super convenient!) and a relay to turn my ordinary led light strip to be a remote controlled.

记得上次玩Arduino已经是2014年的事情了,那会儿用的还是ATMega系列的MCU,装专用IDE,写的C lang。

近10年后,感觉家用IoT玩的都是ESP和Pico了。至于开发语言,常青树C lang自然还有的,但大多视频教程则是外行更容易上手的Micro Python、Lua乃至只要配个yaml config的ESP Home —— 可见贵圈也很卷。

今天搞的是这块ESP32-C3-12F,带wifi、蓝牙BLE和一路继电器,以上都属于一般配置。比较巴适的是,这货带三模供电,AC 220V、DC 7~12V,以及MicroUSB,这就很方便了,省一个手机充电头。

废话少叙,先看实验结果吧。

服务器自然是Proxmox VE Home Server上的vm,数据内网本地化存储(2C 2G 32G即可),公网使用走ddns没毛病。

【注】HAOS(Home Assistant Operating System)的部署有N多选择。支持X86物理机、至少三种VM(kvm、vbox、vmware)、三种主流操作系统(Linux、Win、MacOS),两种容器(docker、lxc)、以及包括树莓派在内的至少三种SBC…… 这友好程度,你要说自己小白不会安装,都对不起开发者。只是这里要注意,选择安装方式一定要带上Supervisor,否则无法支持ESPHome扩展,详情参阅官网文档

HAOS装好后,打开web服务,安装ESPHome的插件,打开后就能开始设计ESP固件了。

完整阅读本篇»

基于红米AC2100的集客AC/AP方案

2021-10-15 作者:

Free (but proprietary) AC/AP wifi solution by Wuhan GECOOS, is here tested on 2 units Redmi AC2100 and a Proxmox based x86_64 vm.

这篇不准备多写,简单谈一下感受。

硬件结构如下,

  • AP是两台Redmi AC2100,单价159(不是wifi6,消费主义远离我)。
  • AC是书房自建私有云上一台vm,无法单独计费,权当免费。

PROS:

  • 性价比突出。总价只有318,即使考虑到大房子需要3台AP,也只要500块不到而已,还不到一台中端wifi6路由器的钱。有人可能会说,别逗了,家用AP的信号,3台怎么够 —— 哥们,别那么肯定,你说的是面板AP,我这是普通家用路由器(外置天线)刷的AP,原本设计每个都是带全家的,要比信号强度也得比商业吸顶AP吧?
  • AC可以不要,AP支持胖AP模式。这点倒是跟其他家用AC/AP方案接近,并不特别。我猜胖AP漫游效果差点儿?因为我不缺私有云机器,没有做具体测试。
  • 蛮关键的一点,AC可以只做旁路。也就是说,主路由还是主路由,你不一定用这个集客AC做主路由(虽然它也具备路由能力),这一点非常关键。作为AC,管好你的AP,做好弱踢和切换就行了,路由我有更好的选择。
  • 覆盖和速度都能让人满意,mbp连上5G信号,NAS大文件传输不比千兆有线差很多。
  • 每个房间多了一个4口千兆交换机,还tm支持vlan,这个价钱做下来的方案有这么强的灵活性,你敢信?

CONS:

  • 漫游切换,在安卓手机上切换起来,还是没有单路由(不切换)那么流畅。当然,物理问题靠软件显然不能强求,毕竟在家里边角的wifi速度显著提高了;多年前的iPhone 6SP好像漫游效果不错的说;后悔没有拿Android和iPhone互相打个微信视频然后走动一下做个测试。
  • 【昧良心说】集客固件免费但不开源。至于开源与否我不关心,毕竟我刷个路由不是去商业化,我只关心有无黑产,这点主要看开发团队的人文品质吧。真要不放心,自己刷一套放个抓包环境测几个月就有数了;这问题倒不是针对集客,ikuai和梅林也是同一个路子,再说那些原厂(不免费)的路由器系统就能绝保没后门没黑产?

以下纯截图:

AC界面:wifi配置模板下发

完整阅读本篇»

DIY带外管理 · 强悍Pi-KVM

2021-09-27 作者:

Let’s talk about the open source IP-KVM (or KVM over IP) solution based on Raspberry Pi 4B, named Pi-KVM, which has sophisticated feature sets that can provide almost same experience like HP ILO or DELL iDRAC, only except the hardware monitoring and err logging.

  • Hardware screen capture with low latency.
  • OTG Keyboard & mouse; Mass Storage Drive emulation.
  • ATX power control (thru Pi GPIO) with some MOSFET relays.
  • RJ-45 and USB serial console port.
  • IPMI BMC, redfish… all those professional server stuff support.
  • Nice and easy-to-use web UI with virtual keyboard, video quality control, key-combination shortcuts and virtual USB drive control.
  • A fully featured, user-customizable Linux OS.

只要玩过专业带外管理,基本就很难接受只有本地键鼠,以及OS之上的RDP和VNC了吧。

随便放两张Dell iDRAC系统截图吧。

今天要聊到的Pi-KVM,在简单廉价的硬件结构上,实现了除硬件子系统监控和告警之外,专业BMC几乎所有功能。

  • 低延迟的显示器信号捕捉和传输(100ms以内)。
  • OTG 键鼠,U盘模拟;给家用机远程load OS不叫事儿。
  • 通过Pi GPIO外加几个继电器实现的ATX电源控制;不说也懂,控制不了电源还叫BMC么。
  • RJ45和USB串口;既能控制路由/交换,也能控制自己。
  • IPMI BMC,redfish… 专业能玩的,它都能玩。
  • 简洁实用的web控制台,软键盘、组合键、粘贴板、视频质量控制、虚拟USB驱动器控制,全乎+易用。
  • 除了所有以上之外,还是个全功能的Arch Linux ARM版本,灵活性刚刚的,这可把专用BMC打趴了吧。

多吹无益,上图。

【注】请忽略裸线,5V和GND用胶带缠了一下,反正不是高压,胶带不绝缘也没关系,别物理刺穿就行;银色金属箔是屏蔽,说明小米的线做工还是靠谱的哈,该有的都没少。

文档制作基于Ventoy的Win10安装盘,全程不用物理U盘,安装Windows。

如果我没说清楚,就重申一遍。类似Dell和HP的专业BMC,可以直接远程挂载ISO装系统。Pi-KVM更狠,借着自己内置存储,直接把U盘/光盘镜像上传,经过物理USB线,模拟一个驱动器插到被控电脑就搞定了,有点爽。

如上所言,被控电脑经USB线连接仿真U盘,BIOS从Linux file-CD启动,无论装什么OS都能够顺利引导。

完整阅读本篇»