基于 Raspberry Pi 4B 单臂路由
Here we’re gonna talk about a hand-made router (NAT gateway) using a Raspberry Pi 4B with at least 3 implementations. Sorry the wifi router is not included since it’s kinda easy to find the tutorials about the hostapd stuff, and the signal from onboard wifi is not quite usable anyway.
这里聊一下基于树莓派4B的有线单臂路由实现,至少三种技术实现;wifi路由就不谈了,基于hostapd的教程遍地都是,信号强度也是个问题,可用性仅限于贴脸。
如果只使用iptables的话,实现一个基于pi的路由其实只需要一句话。加上让内核开启转发,两句话打完收工。
Method #1: Several simple commands could simply turn the Pi OS to be a layer 3 device with SNAT (or MASQUERADE).
|
1 2 |
sudo iptables -t nat -I POSTROUTING -s <lan subnet> -j MASQUERADE sudo sysctl -w net.ipv4.ip_forward=1 |
开个玩笑,起码还得先给LAN口设个固定地址,比如给eth0设置 192.168.17.1/24 ,那么上边<lan subnet>就应当是 192.168.17.0/24 。
如果还需要dhcp服务器(非必须)的话,去看一下dnsmasq,熟练工的话,基于一般的Pi OS手打路由只要10分钟(含参考文档)。
PS:要问wan口谁来承担?wifi可以,给eth0加vlan也可以,看想怎么玩。
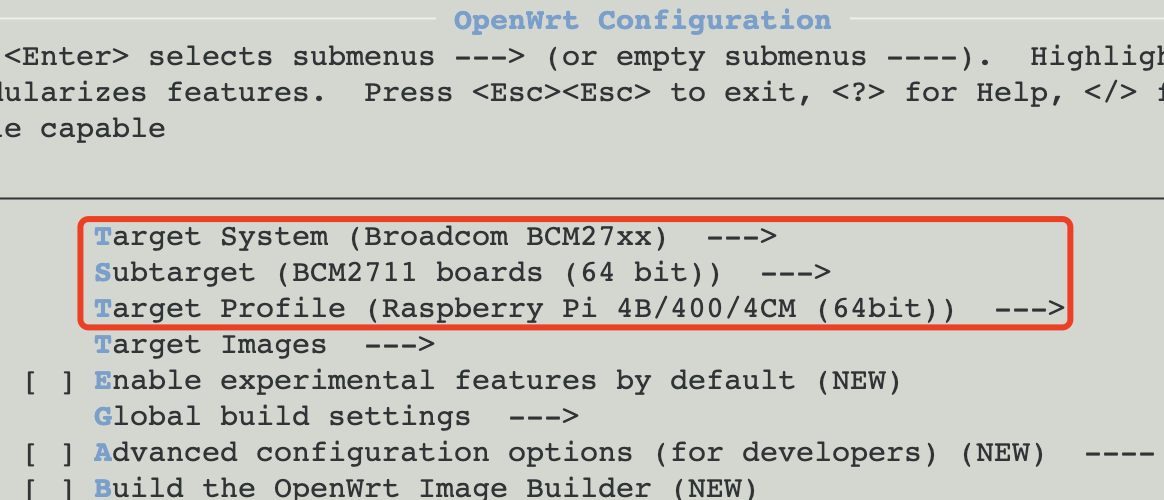
接下来就是自行编译OpenWrt的玩法,如果不想编,直接去官网下载预编译的镜像也完全ok。该镜像内置了基于Pi 4B的所有硬件驱动,也包括802.11nac的wifi支持,刷机后直接使用没有任何问题。
Method #2: Feel free to build the OpenWrt and run it on the bare metal Pi 4B, or a prebuilt image can be downloaded from OpenWrt official website then you don’t have to build that on your own.
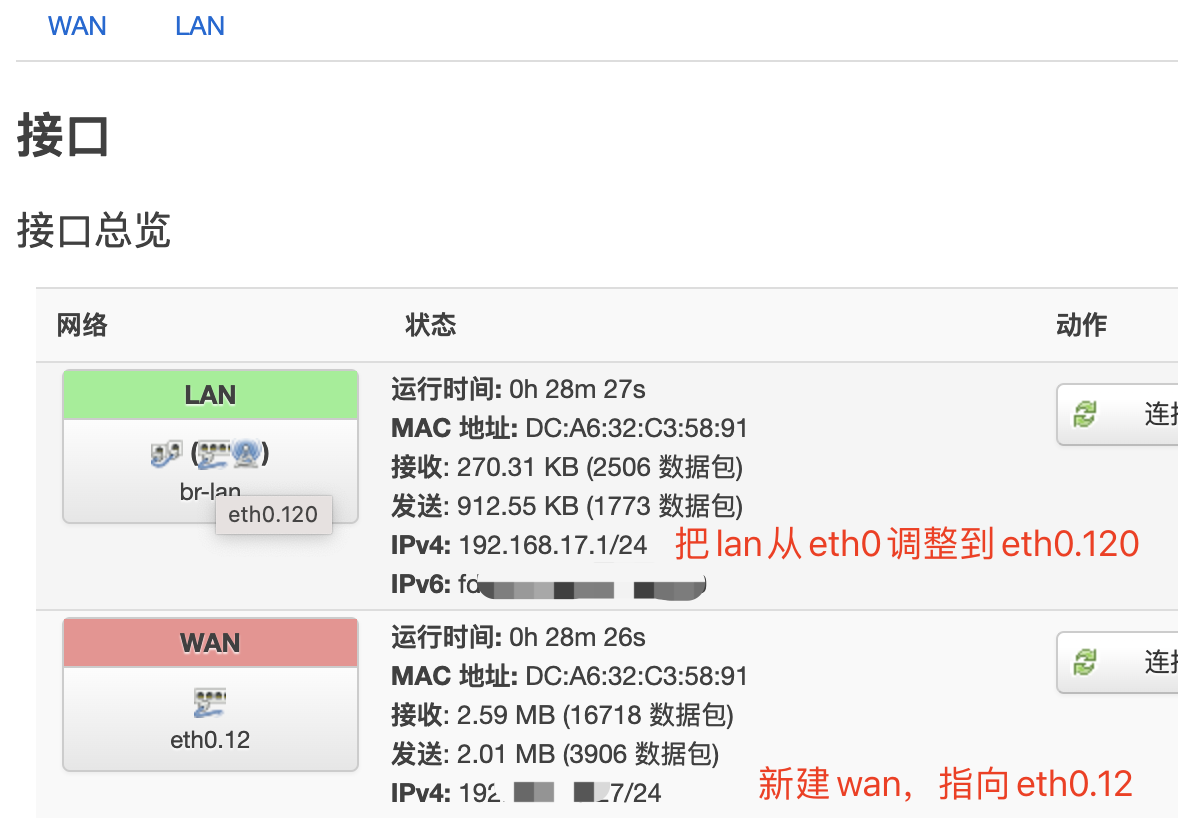
默认设定是br-lan连接eth0,无wan口。因其为单臂路由(没有两张物理网卡),我把br-lan口连接改为 eth0.120 ,wan口设定为 eth0.12 ,当然交换机需要是802.1q VLAN switch,保存设置后正常上网就可以了。
PS:更改lan口vlan id设置的过程,最好走wifi,这样就不会在设置过程中断线。当然还有个选择就是把vlan id 1留给一个接口(无论wan还是lan),随意就好。
对单臂路由在内网进行iperf3带宽测试,MTU 1500就不改了,差不多可以跑满(下图右下)。由此可见,Pi 4B的全双工千兆网靠得住,作为单臂路由没问题,同时跑满带宽的资源消耗也不高。
文章的脚注信息由WordPress的wp-posturl插件自动生成
完整阅读本篇» 京公网安备 11011502004657号